Are you having trouble with your USB ports on Windows 10? If so, don’t worry – you’re not alone. In this blog post, we’ll walk you through the steps to reset your USB ports. Keep reading to get started!
What To Do if Your USB Ports Aren’t Working
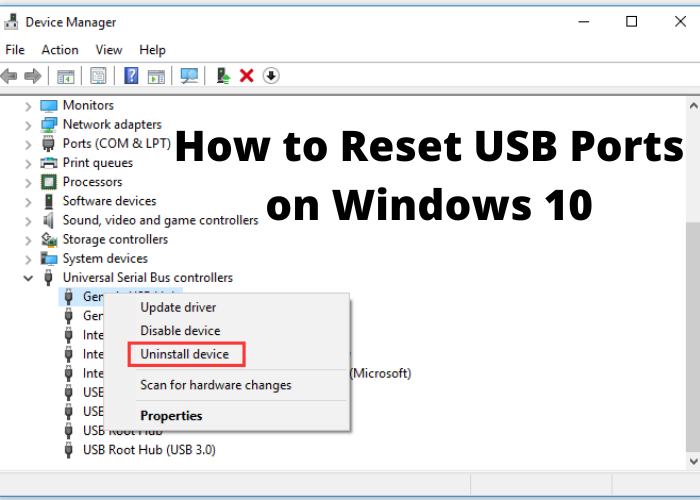
Follow these steps to reset your USB ports on a Windows 10 computer:
- Open the Device Manager.
- In the Device Manager, expand the Universal Serial Bus controllers node.
- Right-click each USB controller, and then select Uninstall device.
- After the uninstall is complete, restart your computer.
- The USB controllers will automatically reinstall when your computer starts up.
- Try connecting your USB device again. If it still doesn’t work, move on to the next method below.
How to Reset a USB Port on Windows 10
If you’re having trouble getting a USB device to work on your PC, you can try resetting the USB ports. This process will disconnect and reconnect the power supply to the USB ports, which might clear up any software issues that were causing problems. Keep in mind that this will also disconnect any USB devices that are currently connected, so make sure to save any open files before proceeding. To reset the USB ports on a Windows 10 PC, follow these steps:
- Open the Settings app by pressing the Windows key + I on your keyboard.
- Click on Devices.
- Click on Bluetooth & other devices.
- Under “Other devices,” find the item that you want to remove and click on it.
- Click the Remove device button. A confirmation dialog box will appear; click Remove device again to confirm.
Repeat these steps for each additional item listed under “Other devices.” Once you’ve removed all of the items, unplug your PC’s power cord from the outlet and wait for 30 seconds.
Plug the power cord back in and turn on your PC. Your USB ports should now be working properly.
The Different Ways to Reset a USB Port on Windows 10
If your USB ports have stopped working, there are a number of things you can try to get them going again. First, unplug any devices that are plugged into the USB ports and restart your computer. This will sometimes reset the ports and allow them to start working again. If that doesn’t work, you can try opening Device Manager and expanding the “Universal Serial Bus controllers” section. Here, you’ll see a list of all the USB devices on your computer. Double-click on each one, select the “Driver” tab, and click “Uninstall”. Once they’ve all been uninstalled, restart your computer and they should be reinstalled and working again. If that still doesn’t work, you can try opening the Registry Editor and navigating to “HKEY_LOCAL_MACHINE\SYSTEM\CurrentControlSet\Control\Class\{36FC9E60-C465-11CF-8056-444553540000}”. From here, delete any entries that have a “Name” of “LowerFilters” or “UpperFilters”. Restart your computer and the USB ports should now be working.
How to Troubleshoot a USB Port That Isn’t Working
- Check if the USB port is working or not
If your USB port is not working, the first thing you should do is check if it is physical damage or not. If it is, then you would need to take it to a specialist for repairs. If there is no physical damage, then try unplugging and replugging the device into the USB port.
- Check if the USB Drivers are up to date
If the USB drivers are not up to date, then this could be the reason why your USB port is not working. To check if the drivers are up to date, go to Device Manager and look for Universal Serial Bus controllers. If there are any yellow exclamation marks next to the devices, then this means that the drivers need to be updated. To update the drivers, right-click on the device and select Update Driver Software.
- Use a different USB port
If the first two methods don’t work, then try using a different USB port on your computer. Sometimes, a particular USB port might be malfunctioning and that’s why your devices are not being recognized. By trying a different USB port, you can rule out this possibility.
- Reset
